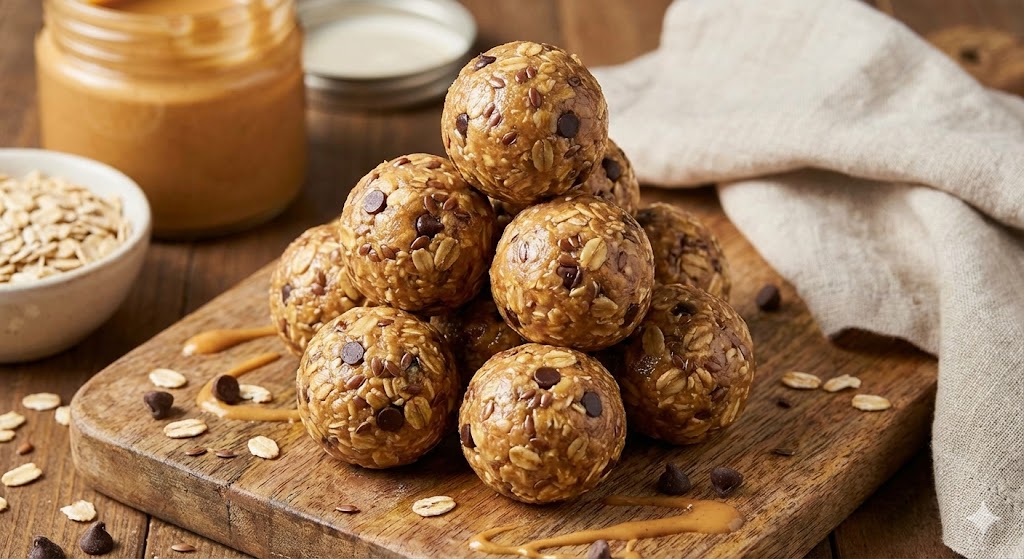
Fuel Your Day: Irresistible No-Bake Peanut Butter Energy Bites (Healthy & Easy!)
Jump to RecipeIn our fast-paced lives, finding a snack that’s both genuinely delicious and genuinely good for you can feel like searching for a culinary unicorn. Enter the humble yet mighty No-Bake Peanut Butter Energy Bite. These aren’t just snacks; they’re tiny powerhouses of nutrition, designed to keep you sustained, satisfied, and utterly delighted, all without ever turning on your oven. Perfect for busy mornings, afternoon slumps, or pre-workout boosts, these bites are about to become your new kitchen essential.
The Story Behind
While the concept of combining nuts, grains, and sweeteners for sustenance is ancient, the ‘energy bite’ or ‘power ball’ as we know it today truly blossomed in the last two decades. Born from a desire for wholesome, unprocessed alternatives to packaged snacks, these no-bake wonders offer a customizable, nutrient-dense solution. They reflect a modern appreciation for mindful eating and a return to simple, whole ingredients that nourish both body and soul, perfectly embodying the convenience and health-consciousness of contemporary food culture.
Why This Recipe Works
- Nutrient-Dense Powerhouse: Packed with fiber from oats and flax, healthy fats from peanut butter, and protein from chia seeds, these bites offer sustained energy release, keeping hunger at bay longer.
- Effortless & Accessible Preparation: With absolutely no baking required and simple ingredients found in most pantries, these bites come together in minutes, making healthy eating achievable even on the busiest days.
- Infinitely Customizable & Versatile: Beyond their core ingredients, these bites are a blank canvas for your creativity. Add chocolate chips, shredded coconut, dried fruits, or different seeds to tailor them perfectly to your taste and dietary needs.
Step-by-Step Instructions
1. Gather & Combine Your Wholesome Crew
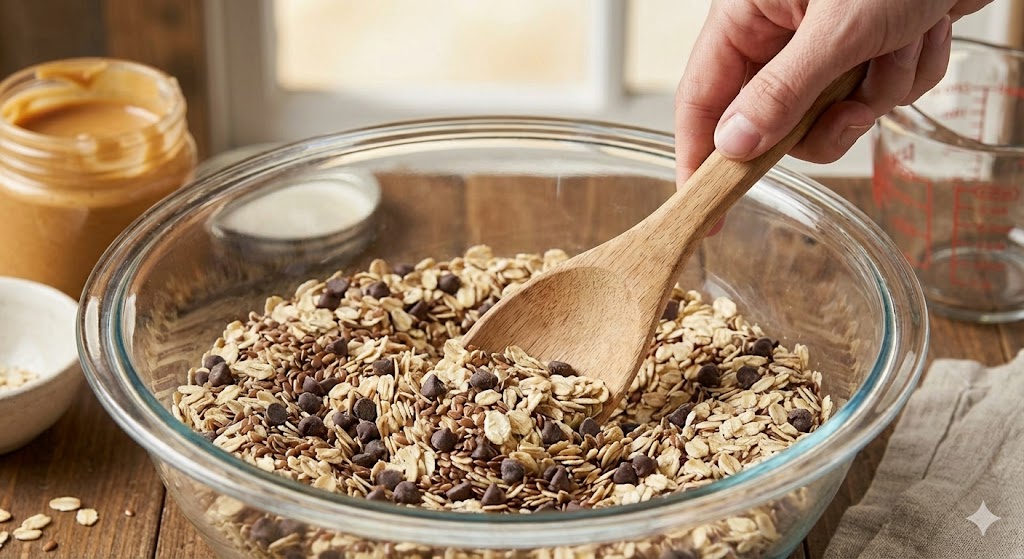
In a large mixing bowl, combine the rolled oats, creamy peanut butter, sticky honey (or maple syrup for vegan!), mighty chia seeds, and the warm essence of vanilla extract. For an extra nutritional punch, stir in flaxseed meal. Ensure everything is ready to meld.
2. Mix, Roll, and Shape Your Bites
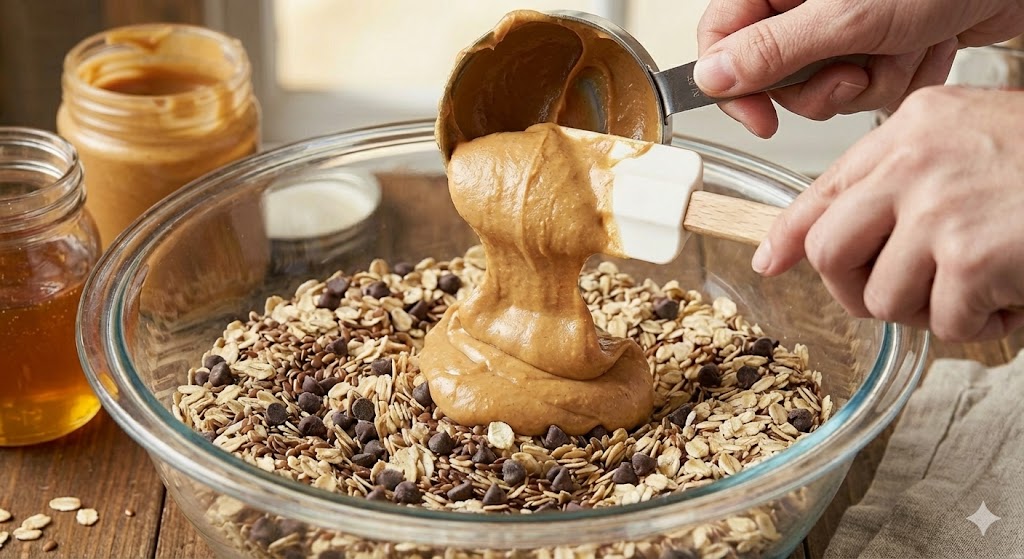
Using a sturdy spoon or your clean hands, thoroughly mix all ingredients until a uniform, somewhat sticky ‘dough’ forms. If the mixture feels too dry, add a touch more peanut butter or honey. Then, scoop out small portions and roll them into perfectly spherical, bite-sized balls.
3. Chill to Perfection, Then Indulge
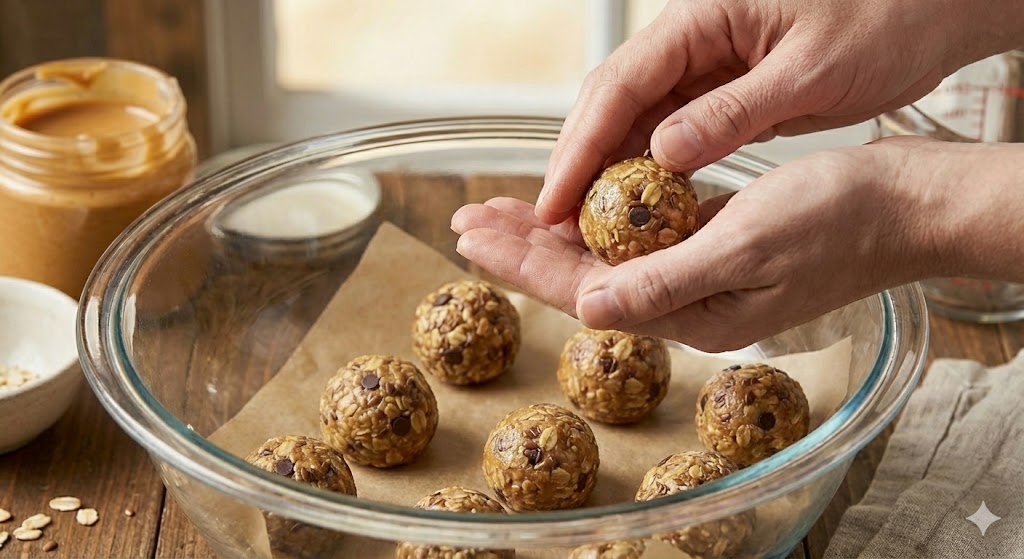
Arrange your beautifully rolled energy bites on a parchment-lined baking sheet or plate. Pop them into the refrigerator for at least 30 minutes. This chilling time allows them to firm up, making them less sticky and even more delightful to eat. Once firm, they’re ready to be devoured!
Chef Tips
- Ingredient Customization: Feel free to swap peanut butter for almond butter, cashew butter, or sunflower seed butter for allergy-friendly options. For a vegan version, ensure you use maple syrup or agave nectar instead of honey.
- Add-In Adventures: Elevate your bites with mini chocolate chips, shredded coconut, chopped dried fruit (cranberries, apricots), a pinch of cinnamon, or even protein powder for an extra boost. Start with small amounts to maintain texture.
- Texture Adjustments: If your mixture is too sticky, add a tablespoon or two of extra oats or flaxseed meal. If it’s too dry and crumbly, add a touch more peanut butter or honey until it comes together easily.
- Storage Savvy: Store your energy bites in an airtight container in the refrigerator for up to 1 week. They can also be frozen for up to 3 months; simply thaw slightly before enjoying.
Frequently Asked Questions
Can I make these energy bites gluten-free?
Absolutely! The primary ingredient, oats, is naturally gluten-free, but always ensure you choose certified gluten-free rolled oats to avoid cross-contamination if you have a strict gluten intolerance.
What if my mixture is too crumbly or too sticky to roll?
The consistency can vary based on your brand of peanut butter and honey. If it’s too crumbly, add an extra tablespoon of peanut butter or honey. If it’s too sticky, add another tablespoon of rolled oats or flaxseed meal until it’s just right for rolling.
Can I use steel-cut oats instead of rolled oats?
While rolled oats are ideal for their texture and ability to bind, you can use quick oats as a substitute. Steel-cut oats are much coarser and won’t work well in this no-bake recipe without cooking them first, which defeats the ‘no-bake’ purpose.
Fuel Your Day: Irresistible No-Bake Peanut Butter Energy Bites (Healthy & Easy!)
Ingredients
- 1 cup (240g) creamy peanut butter (or nut butter of choice)
- 1/2 cup (120g) honey or maple syrup (for vegan)
- 2 cups (180g) rolled oats (certified gluten-free if needed)
- 1/4 cup (30g) chia seeds
- 1/4 cup (30g) ground flaxseed meal
- 1 teaspoon vanilla extract
- Pinch of sea salt (optional, enhances flavor)
- 1/4 cup (40g) mini chocolate chips (optional)
- 1/4 cup (20g) shredded unsweetened coconut (optional)